Monetize apps with pay-per-item content
Learn how to create a pay-per-item subscription
This is a beta offering.
By using this documentation, you are agreeing to abide by the terms of the JWP Beta Program Agreement.
Within an app config, you can define content as pay-per-item. Pay-per-item is a media-specific monetization model.
Requirement
Enabled account services
Define pay-per-item content
The following sections explain how to define pay-per-item content when using either the JWP Service or non-JWP services to enable user logins.
JWP Service
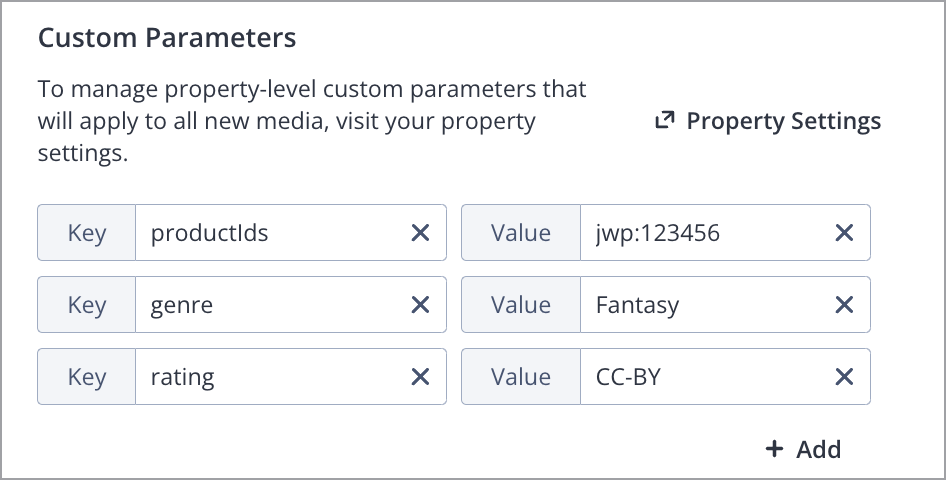
Custom Parameters section for pay-per-view item
After defining your settings with the help of your JWP representative, you can designate content as pay-per-item:
- From the Media Library, click the name of a media item. The details page appears.
- Under Custom Parameters, click +Add. A new row appears.
- For the Key, enter productIds.
- For the Value, enter the corresponding JWP asset ID (for example, jwp:123456).
If the same value is applied to multiple media items, a bundle of pay-per-item content will be created.
- Click Save.
Non-JWP systems
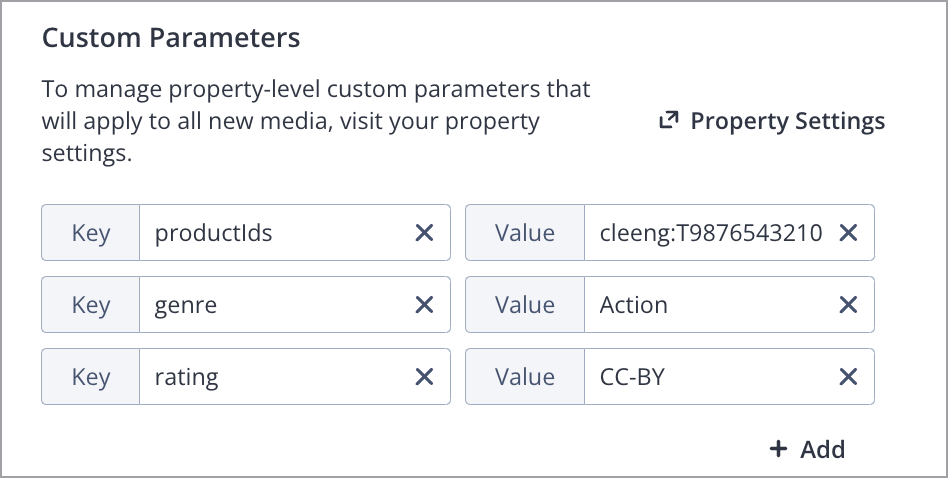
Custom Parameters section for pay-per-item
After defining your settings, you can designate content as pay-per-item:
- From the Media Library, click the name of a media item. The details page appears.
- Under Custom Parameters, click +Add. A new row appears.
- For the Key, enter productIds.
- For the Value, enter the corresponding Cleeng ID (for example, cleeng:T9876543210_US).
- Click Save.
Updated 5 months ago