Advertising Experiences
An advertising experience allows you to define video advertising settings, set up ad breaks, and enable Player Bidding.
Define an advertising experience
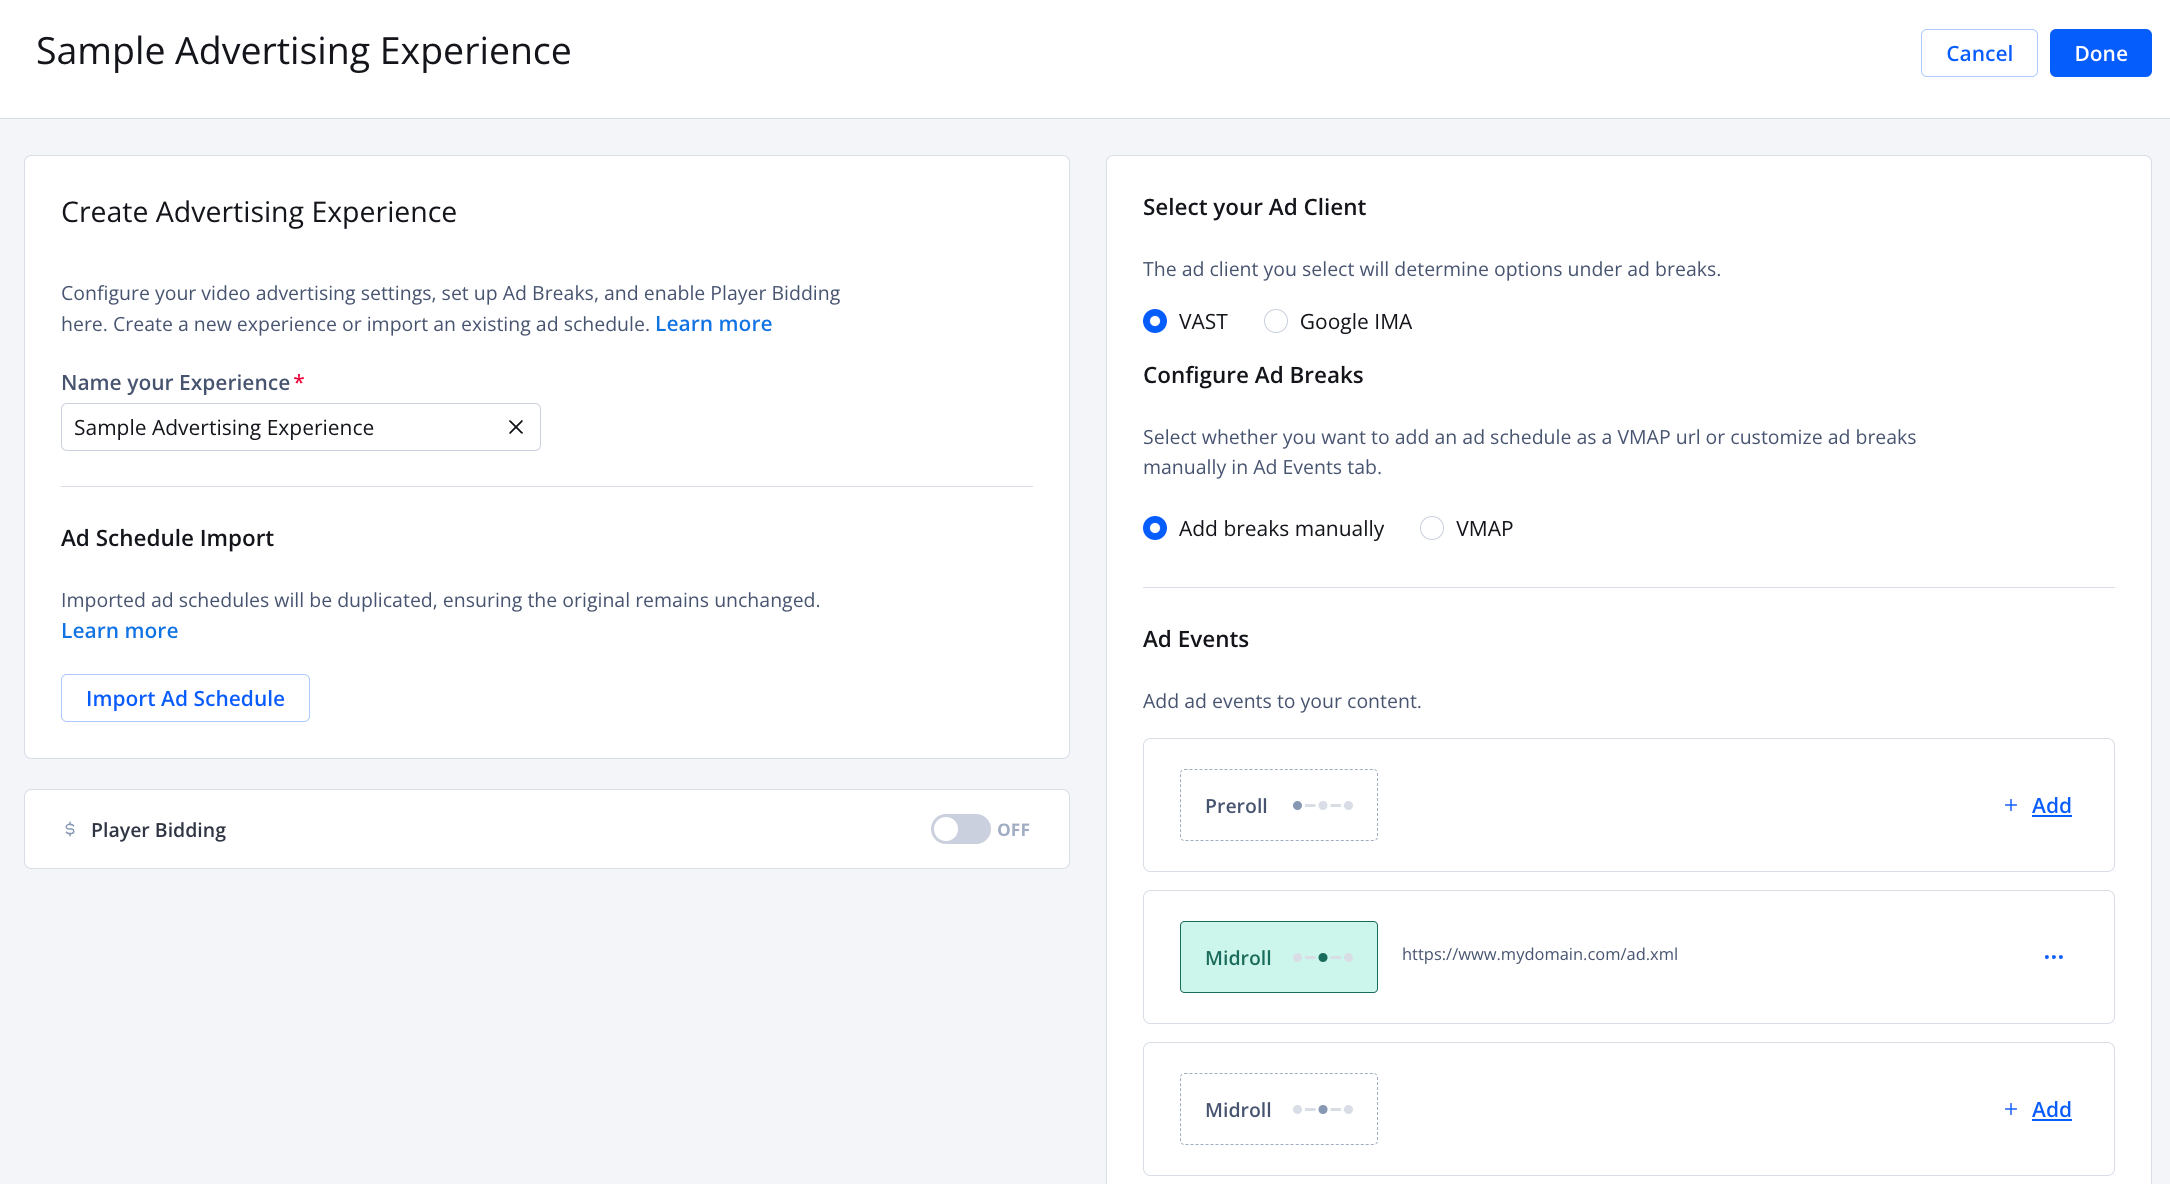
Advertising Experience details page
Use the following steps to create an advertising experience:
- On the strategy tree, click +Add Experience > Advertising Experience. The advertising experience details page appears.
- Under Create Advertising Experience, enter a name in the Name your Experience field.
- (Optional) On the right side of the page, define the advertising experience.
As an alternative, you can copy the settings of an existing ad schedule:
- Under Ad Schedule Import, click Import Ad Schedule. The Import Advertising Schedule panel appears.
- Select the ad schedule to import.
- Click Import. The settings of the ad schedule will be used to populate all the advertising experience sections on the right side of the page.
If you make changes to the existing ad schedule in the future that you want reflected in the strategy, you must repeat the previous steps.
- (Optional) Click the Google Publisher Provided Signals toggle to ON.
Google Publisher Provided Signals* allows automatically passing IAB contextual segments through the ad tag to improve programmatic monetization.
When using this feature, note the following:
- JWP will attempt to contextualize videos, but not all videos will have the IAB contextual segments passed through Google PPS.
- If the
&ppsjquery parameter is defined in the ad tag, JWP will not override the value.
* Google Publisher Provided Signals needs to be enabled by JWP. Contact your JWP account representative to opt in.
- (Optional) Click the Player Bidding toggle to enable and configure Player Bidding. Use only steps 4-12 of Create a Player Bidding template to configure this section.
- Click Done. The experience appears on the decision tree.
- Click Save.
Settings
The following sections explain how to Configure ad breaks manually or Configure VMAP ad breaks when using the VAST and Google IMA ad clients.
Configure ad breaks manually
Follow these steps to manually configure ad breaks:
- Click a radio button to Select your Ad Client.
- Under Configure Ad Breaks, choose Add breaks manually.
- (Google IMA) Select a VPAID Mode for the ad.
VPAID Mode Description Insecure Loads in a friendly iFrame
This allows the ad access to the site via JavaScript.Secure Enabled using a cross domain iFrame
VPAID ads cannot access the site. A VPAID ad that depends on friendly iFrame access may not play.Disabled No ad
VPAID ads will not play. An error will be returned if VPAID ad is requested.
- Under Ad Events, click + Add next to Preroll, Midroll, or Postroll. The configuration panel appears.
- Under Ad Tag URL, enter the URL of the ad tag.
Macros can be added to each ad tag to target the ads returned. These macros are replaced in real time. It is common to add 10+ macros to a single ad tag
- (Optional) Click Use Key for Ad Tag if available. Enter the key for the custom data in the textbox that appears.
- (Optional) Click + Add Waterfall Tag to enter additional ad tag URLs.
Creating an ad tag waterfall helps you to maximize ad revenue by attempting to show a valid ad to your viewers during an ad break.
- (Preroll) Click the toggle to enable or disable Click to Play on error.
Click to Play on error is enabled by default. This prevents incurring streaming costs on autoplayed content that is not monetized or being watched by a viewer.
- (VAST - Optional) To increase viewer engagement, click Skippable after ___ seconds. Enter the length of time in seconds a viewer must watch an ad before having the ability to skip the ad.
- (Google IMA - Optional) Click Non-linear overlay ad to allow an ad banner to display over video content without disrupting the video.
- (Midroll) Select an option from the Break Timing dropdown menu.
- (Midroll) Next to the Break Timing dropdown menu selection, enter the location in the video where a midroll ad break occurs:
- For Seconds into Video, enter the location in seconds
- For % of Video, enter the location as a percentage -- without % (for example, 15 for 15%) -- of the video.
- For Timecode, enter the location in the following format: hh:mm:ss:mmm.
Configure VMAP
- Click a radio button to Select your Ad Client.
- Under Configure Ad Breaks, choose VMAP.
- (Google IMA) Select a VPAID Mode for the ad.
VPAID Mode Description Insecure Loads in a friendly iFrame
This allows the ad access to the site via JavaScript.Secure Enabled using a cross domain iFrame
VPAID ads cannot access the site. A VPAID ad that depends on friendly iFrame access may not play.Disabled No ad
VPAID ads will not play. An error will be returned if VPAID ad is requested.
- Under Ad Tag URL, enter the URL of the ad tag.
Macros can be added to each ad tag to target the ads returned. These macros are replaced in real time. It is common to add 10+ macros to a single ad tag
- (Optional) Click Use Key for Ad Tag if available. Enter the key for the custom data in the textbox that appears.
- Click the toggle to enable or disable Click to Play on error.
Click to Play on error is enabled by default. This prevents incurring streaming costs on autoplayed content that is not monetized or being watched by a viewer.
Updated 5 days ago