Add a live channel
Add a channel for live content from the dashboard
A live channel is a grouping of live event streaming settings. Each live channel that you create corresponds to a specific encoder. Unless you replace your encoder or increase the number of encoders you use for streaming your events, you only need to create a live channel once for each encoder.
With live channels, you have the ability to broadcast live events to your audience:
- Support 12-hour event streams
- Enable seamless workflows with hands-off publishing
- Provide live event streams that instantly convert to video replay after broadcasting has finished
- Stream live events to your web players, mobile apps, apps, and social media platforms
- Integrate an Electronic Programming Guide (EPG) with your channel
Depending on the status of the video of your Live Channels event stream, replays of your event stream can be billed at Live Usage minute rates or VOD Streaming rates.
Prerequisites
| Item | Description |
|---|---|
| Live streaming entitlement | Entitlement for live streaming For more information, contact your JWP representative. |
| App config entitlement | Entitlement to use the app config App config entitlement also enables the content types feature. For more information, contact your JWP representative. |
| Content types loaded to property | Type of media based on shared custom parameters To access the Live Channel content type, load default content types to your JWP property. |
Add a live channel
Follow this step to add a live channel in the JWP dashboard:
- Create a live stream.
Be sure to click the Add Status and Scheduling Custom Parameters to Media Item checkbox as part of step 7.
Add live channel metadata
Follow these steps to add metadata to your live channel:
-
From your Media Library, select a live channel. The media details page appears.
-
Under the Content Type section, fill out the related Live Channel fields.
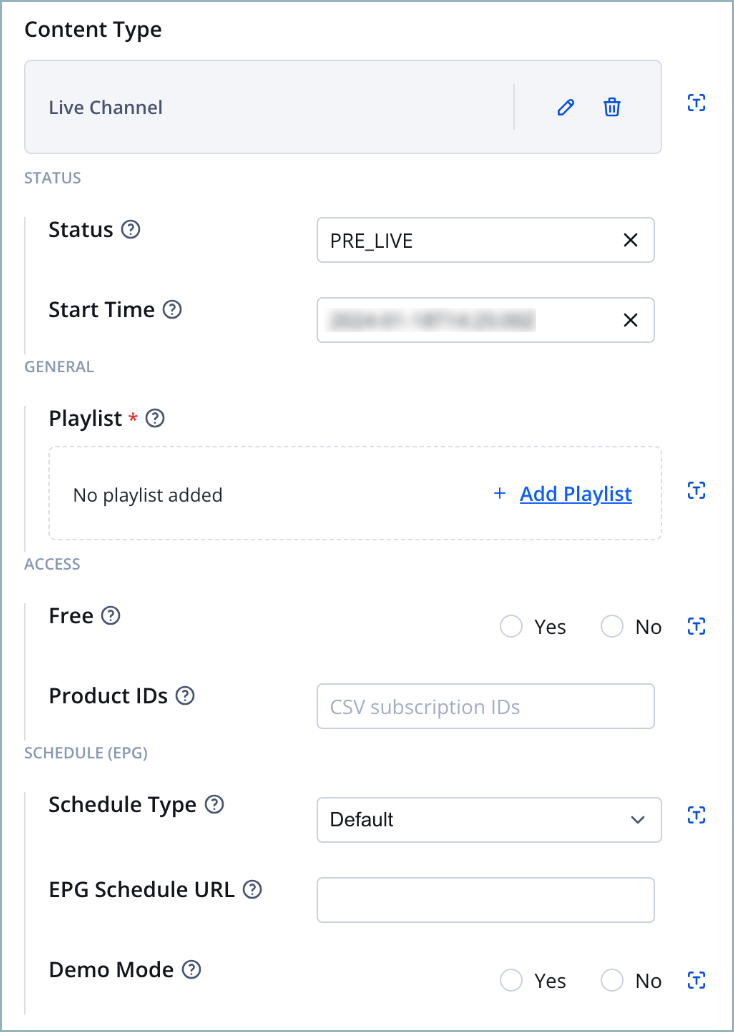
Field Description Free Flag indicating whether content is free or paid
Use the following step to configure this field:
1. Click the Yes or No radio button.Product IDs JWP identifiers of subscription assets that allow access to the content
Use the following step to configure this field:
1. In the textbox, enter a comma-separated list of all assets with content access.EPG Schedule URL URL path to an EPG schedule source for the stream
Use the following step to configure this field:
1. In the textbox, enter the URL of your EPG.Use EPG Demo Toggle to enable JWP’s demo EPG for the stream
Use the following step to configure this field:
1. Click the Yes or No radio button.
NOTE: Only enable this demo for non-production sites where you want the EPG schedule to loop. -
Click Save.
Updated 3 months ago